Wednesday, March 24, 2010

Eggtastic!


So here are my newest Easter postcards!

The eggs were made from layering scraps of coloured and metallic papers. I cut out the egg shape, gessoed them, and then added the black stamping. I then antiqued the edges to create some dimension to the eggs using sepia and black ink.

I made the backgrounds using the same technique as in the spring rabbits, watercolour pencil with crayon and fluid acrylics on top.

Again, i sewed the egg onto the background and then added some card to the back and sewed that as well.

Then i gel mediumed everything to make it post-safe!

On a side note, I sent the first batch of postcards off to people yesterday...So if you know me you might just be getting one in the mail soon!

Monday, March 22, 2010

Graffiti Bunnies!


These four postcards used the woven paper leftover from my "Spring Rabbits", placed on a 'graffiti' background.

I created the background first by placing several washes of fluid acrylic onto watercolour paper, spraying the wet acrylics with rubbing alcohol to add more texture and interest. I placed a layer of gel medium over the top, and then wrote, scribbled and drew over the top with crayons and oil pastels in contrasting colours. I scraped back the colour with a spatula in some places, and then added splatters of watered down black and white paint.

I antiqued the rabbit layers, with a sepia and then some black ink. Then, I sewed around the rabbit shape to attach the two layers together (except in Music-Bunny#1). Then i added the additional cardboard to the back, and sewed around it as well, securing all three layers together.

I then gel mediumed both front and back to provide a good seal and waterproofing.

I have an eggcellent series of postcards in the works right now...cant wait to share those next!

Sunday, March 21, 2010

Easter Bunnies!


I have been channeling my inner 4 year old this past week or so, and have been doing some paper-weaving. I used the woven paper to make some Easter post-cards. To make these four, entitled Spring-Rabbit#1-4 , I started by weaving some sheet music and newspaper strips into the total size of the postcard. I then cut the rabbit shape out, and set the other pieces aside. Then, I made the backgrounds using watercolour pencils on watercolour paper. I went back over the backgrounds with a mixture of crayons, highlighter markers, regular pencils, and more watercolour pencils, then painted over the top again, using a mixture of fluid acrylics and regular acrylics.

On Spring-rabbit#3 I added some newsprint transfer, and some ink along the outer edges (for something different). I also sewed the rabbit to this one as an experiment.

I then inked the rabbits with distress inks, and hot glue gunned them to the backgrounds.

Because my watercolour paper was not quite strong enough, i sewed a rectangle of cardboard packaging (plain side out) to the back. The stitching provided a nice little frame for the bunnies.

I then gel-medium-ed the entire thing, front and back to provide waterproofing.

Friday, March 12, 2010

CPS Postcard Swap-Jan/Feb 2010 issue.


I recently participated in the Cloth Paper Scissors Postcard swap, from the Jan/Feb 2010 issue (#28). This was my entry. It will be swapped and sent to another participant, and i will receive a postcard in return.

I started with altering a magazine picture by turning it into a contour painting. I then added it to the pink and purple postcard. I punched holes down the sides of the postcard, added some ribbon, and then added an old bar-code from my luggage. I ripped and tore everything a bit, burnt the bar-code a little, and then added some black embossed '?'. I then added the text: a black embossed "Oh!", and some punch-labeled "wont you...with me tonight", and a print labeled "alter". To make "Oh! Wont you alter with me tonight?". I then put a black wash over everything to age and distress (wiping back where needed). I also added some bronze embossed spots, and some flicks of white and black paint to add more movement.

I was going for a funky kind of feel, to get one "pumped up" about altering. I wanted it to be fun and dynamic. I am really happy with how it turned out, and although i wouldn't call it an "inspirational quote" in the traditional sense, I hope it does inspire whomever it ends up with to create something fun!

If you happened to be the person who received this postcard, could you post your name and location? It would be nice to know where my art ended up. If you have a site, it would be great to see what work you do too!
Posted by Picasa

Thursday, March 11, 2010

How to make a pin-board- Step 5.

If you are using a grid pattern to hang your tiles, measure out where the screws need to go, and mark it.
Add your screws.
Hang each tile.
Once all your tiles are hung, you can add your "stuff"!

How to make a pin-board- Step 4.

Measure out your tile and find the center. Mark out the center lines.
Measure to find where you want to place your picture hangers. (I placed two per tile, 3 inches from the center lines).
Marks where i will place my picture hangers.
Picture hangers in position. It is best to screw them in with a screwdriver- NOT a powertool, as the tile can be fragile and it is best to go slowly and gently, so as to not rip it up.

If you are using multiple tiles, and especially if you are hanging them in a grid pattern, make sure you place the hangers in the same position on each tile. It makes laying them out on your wall easier, and also allows for you to change their positions on the wall later if you want.

How to make a pin-board- Step 3.

Cut the over hang from the corners.
Fold the corners in. Fold both corners on one side at a time.
Fold the flap up and over to the back, keeping your corners neat. Secure with staples. Proceed to opposite (remaining) side and fold the corners in then fold the flap up and over, pulling tight to prevent wrinkles on the front.
At this stage you should have all four sides secured, with nest edges and corners.
The front should be without wrinkles and be taught across the tile.

How to make a pin-board- Step 2.

Fold on side up and over onto the back. Secure it with a staple (or whatever it is you plan to use).
Proceed to staple all along the edge, making sure you keep it tight and flat.
Fold the opposite side up and over onto the back, pulling it tight so you wont have wrinkled on the front. Secure the edge with more staples.

How to make a pin-board- Step 1.

Your tile will have a lip around it, which will need to be removed.
Use your X-acto knife to carefully cut around the beveled edge of the tile.
Pick out your cover material, and cut it to size, leaving enough over-hang to fold over the sides and reach the back. (I used wallpaper from a wallpaper sample book).


How to make a pin-board.


As part of my new plans for my blog, i had mentioned possible "workshops" or how to's. Here is the first, making a pin board for displaying all your notes, as an inspiration board, or whatever else you might want to "pin up".

It is made from acoustical ceiling tiles, the 12" square type, and provide a functional yet decorative (and cheap) solution to pinning stuff up!

You Will Need:

Acoustical ceiling tile(s)- you can get these from the hardware for about $1 each.
Cover material-fabric, wallpaper, paint all work- whatever works to your decor best.
Staple gun-for wallpaper and fabric.
Glue/Gel medium- if you want to glue an image on, or to seal your paint.
Picture hangers-or other way to attach tiles to your wall.
X-acto knife-to trim tiles and cover material to size.
Screws- to hang with.


It doesnt take much time, especially if you are just covering the tiles with wallpaper or fabric (which i suggest as it can be replaced later if it gets too many pin holes, or you change your decor), and if you paint the tiles the longest part is waiting for the paint to dry. You dont need to primer the tiles to paint them either.

Wednesday, March 10, 2010

Artist Statement-March 2010

Art to me is traversing the unknown abyss of the world.
Plunging oneself into the vastness of everything and
resurfacing with an amalgam of elements to inspire, to create,
to evolve.

I create mixed-media artworks as a way to embrace the infinite
scope of the world. There are so many unfathomable discoveries,
an eternal pool for experimentation. To encompass even a
fraction of such an expanse in my art practices would be an
extraordinary achievement.

Spontaneity and randomness are keystones to my art process.
I work within my mood, I feel my way through a piece, using
only what is accessible to me at that moment. I birth each
artwork, embedding a fragment of myself within.

My current practice is an experiment to find myself in my art
again. A way to discover and redefine my "rules" for
art-making. I want to push my own boundaries, to play and to
attempt to satiate my curiosities. I want to draw on the
boundless inspiration that the universe has to offer, and for
my works to embrace the energy, passion and vibrancy that is
life.

Facebook page for Altered Artifice!

I have created a facebook page for Altered Artifice, as you obviously figured from the header to this post.

It is the first step to my "grand plan" to build a community to share my art-or world domination, whichever comes first ;).

I will be changing the format of how i blog slightly, adding new fun elements, such as technique workshops, challenges, and maybe even competitions to win stuff (i will have to work on the details for that one)!

I plan on opening an Etsy store soon, I am working on more pieces to have a good stockbase first, before i open.

In the meantime, if you are interested, I am more than happy to participate in ATC, Post-card and (possibly) even journal swaps. Email me and we can figure something out!

Monday, March 1, 2010

My FREE studio makeover!

I have spent a very busy weekend re-vamping my art-room, all for free! How, you may ask? Its bit of a long story, but here goes:

We moved into our new house just over a year ago, and I managed to convince my husband to let me have the "shop" area of the house for my art-room (a dirty, dusty workbench with some wall shelving in one corner of the utility room), and he could use the "garage" (a room with a garage door to the front yard, but too narrow to actually park a car in it). I was excited to have my space, and to have a nice long workbench- I envisioned myself working on multiple projects at once and finally being a productive artist. We have a small budget for house renovations and updates, but since the house is very outdated throughout, i had to make do with my space as it was, despite the gouged out work surface meaning i cant use it to draw, and despite the decrepit indoor/outdoor carpet full of muck and dust on the floor. What little budget we had was used to make the "garage" into a workable shop so my husband could start on the big renovations upstairs.

As time progressed in my little art-room, I realised it WASN'T an inspiring space, and it wasn't a place i really wanted to be, or worse, create. I brainstormed as to why this might be, and figured that it must be my lack of organisation, that all my stuff was everywhere, and ungrouped and basically hard to find. In a little "AHA!" moment I started collecting all the empty baby food jars (my youngest was learning to eat at this point), and I used them to group all my "stuff" together. Each type of pencil, each type of tool, even each type of embellishment got its own jar. The end result was a neat, organised room, where every little object was easily seen. This should have been the end of my problem...right?

Wrong! Unfortunately the carpet was still mucky, the room was still dusty, and because of my allergies, every time I went to create, I found myself itching and sneezing. I talked to my husband about replacing the carpet (preferable with something that could be wiped to remove messes) but it just wasn't possible at this time. Darn!

Fast forward to last Saturday morning; I was flipping through a copy of Cloth Paper Scissors:Studio's, daydreaming and wishing we had the means to have a nice studio like the ones in the magazine, when i noticed that what was catching my eye about most of the studios was not all the fancy furniture, and specially functioning storage solutions, but the colour that people had in their rooms. Staring at a purple studio, i suddenly thought "Wouldn't it be nice to have a colourful art studio instead of a dirty, used to be primer-white studio?" Sure, i didn't want a purple room, not really my thing, but it got my brain ticking...When we bought our house we also inherited a large number of old paint cans, which i gathered up and stored under our stairs, but amongst those cans was a half can of a gorgeous red (currently on our bedroom wall-nice colour not great for sleeping)...What if I used that paint to make a feature wall of colour, brightening my room up might make it a friendlier space!

So a wall went red, and while i was under the stairs digging around i found some other nice colours that i knew we weren't going to be needing elsewhere in the house, so I ripped up the carpet, and painted my floor a lovely chocolate colour! So 1 wall red, chocolate floor, and dirty everywhere else...the freshly painted wall and floor inspired me to go all out (or maybe it was the paint fumes), so i ended up painting every other surface in my room(except the roof) using left over coffee colours and a light beige and a glossy off-white for my shelves and desk!

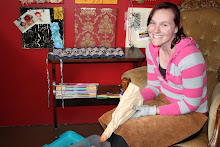
I am so excited! The room looks 10 times bigger, is thoroughly clean and bright and is very ME! Spending most of my waking hours in there over the weekend has also given me an attachment to the room and I am actually excited about being in there, and working!

I think the best thing is all the changes in my room have been FREE! Free storage that works just as well as any of those expensive art-specific storage solutions. Free decor that stirs up my creativity and excitement. Just waiting for the last coat of paint on the floor to dry, and ill move all my stuff back in there and get to work! YAY!